How to Photograph a Meteor Shower With a Phone: Settings, Timing and Patience
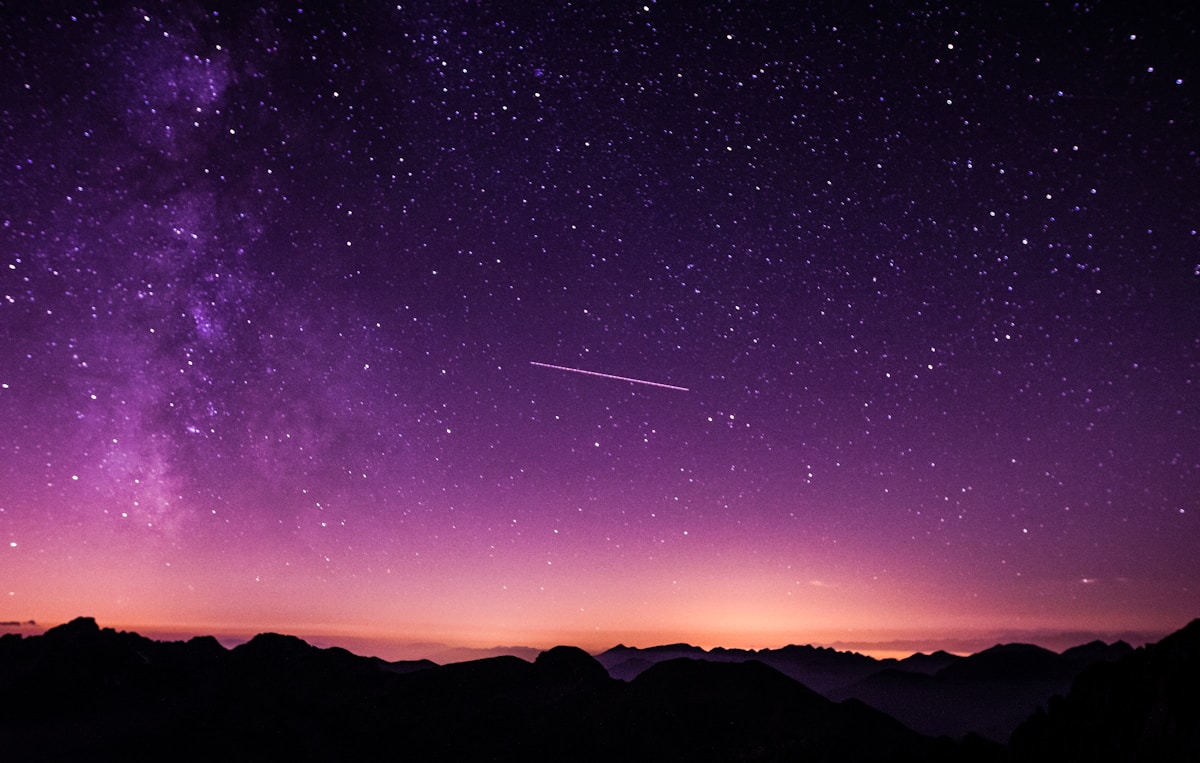
- Primary Signal: How to Photograph a Meteor Shower With a Phone: Settings, Timing and Patience
- Overview: You can capture meteors with a phone if you use the right settings and a steady support. This guide covers long exposures, dark skies and the best shower nights....
- Verification: Analyzed and compiled by FreeSky Cosmos editorial monitoring desk.
Meteor showers are among the most photogenic events in the sky, and they are also among the most frustrating to photograph, because meteors are brief, unpredictable and spread across the whole sky. A phone camera, used correctly, can capture bright meteors, and for many people it is the only camera they own. The trick is understanding the phone's limits and working around them.
The main limit is exposure time. Most phone cameras in automatic mode choose fast shutter speeds and high ISO sensitivity, producing noisy, dark images with no meteors. Meteor photography needs the opposite: a long exposure of 10 to 30 seconds that keeps the shutter open long enough for a meteor to streak across the frame. Modern phones offer this through night mode, a manual or pro mode, or a dedicated long-exposure feature, and finding that setting before the shower night is essential homework.
Stability is non-negotiable. A 20-second exposure handheld will blur stars into trails and ruin the shot, so prop the phone against a bag, lean it on a car roof, or use a small tripod with a phone clamp. Even a cheap tripod transforms results, because it lets you frame a wide patch of sky and leave the camera running while you watch the shower with your eyes, which is, after all, the point of being out there.
Framing strategy matters more than aiming at the radiant, the point in the sky where meteors appear to originate. Meteors can appear anywhere, and the longest, most dramatic streaks often show up 30 to 60 degrees away from the radiant. Point the phone at a wide, dark patch of sky with an interesting foreground, such as a tree line or a hill, and let meteors come to the frame rather than chasing them.
Settings vary by phone, but a reliable starting point is: manual or pro mode, ISO 1600 to 3200, shutter speed 15 to 25 seconds, focus set to infinity or the farthest manual setting, and white balance on daylight or automatic. Take a test shot first and check the stars: if they are sharp points, focus is right; if they are soft blobs, adjust focus. If the sky looks washed out, lower the ISO or shorten the exposure; if it looks black, raise the ISO slightly.
Timing your night around the shower's peak and the Moon makes a big difference. Shower peaks, published by meteor organisations, are when rates are highest, but the hours after midnight are usually best because the radiant is higher in the sky. A bright Moon washes out faint meteors, so a shower peaking near a new Moon is far more productive than one fighting moonlight. The November Taurids and the December Geminids are good examples of showers worth planning around, with the Geminids typically the year's most reliable display.
Patience is the final ingredient, and it is the one most photographers underestimate. Even during a good shower, a bright photographic meteor may appear only every few minutes, and many exposures will show nothing at all. Shoot continuously, review occasionally rather than after every frame, and enjoy the shower itself. The best meteor photos usually come from photographers who stayed out for two hours, not from those who packed up after twenty minutes.
After the night, editing helps. A small increase in contrast and a slight reduction in noise will make faint streaks stand out, and stacking several frames in a free app can combine multiple meteors into a single dramatic image. Share the result, note the shower and settings, and you will have a photograph that surprises people who assumed phones cannot shoot the night sky.
📖 Continue Reading the Full Story
Continue reading this article on FreeSky Cosmos.
⚡ Access Full Content NowMore from FreeSky Cosmos

 ⚡ CyberTech 568
Step-by-Step Tutorial: Playback Speed Calculator — Video Time at Any Speed (Day 2 Guide)
How to accurately use the Playback Speed Calculator — Video Time at Any Speed on CyberTech 568. Discover essen...
🤖 WinBar AI
Step-by-Step Tutorial: YouTube Thumbnail Downloader & Grabber — 4K (Day 2 Guide)
How to accurately use the YouTube Thumbnail Downloader & Grabber — 4K on WinBar AI. Discover essential practic...
 ☁️ FreeSky Cloud
ROI & Value Audit: GST Calculator — Add or Extract GST & VAT (Day 15 Guide)
How to save time and eliminate guesswork with GST Calculator — Add or Extract GST & VAT on FreeSky Cloud. Disc...
 🛰️ FreeSky Aerial
How to Shoot a Drone Hyperlapse: A Beginner's Step-by-Step Guide
A hyperlapse turns a slow drone flight into a spectacular rushing video. Pick a subject with a clear path, use...